
Universal Analytics will be deprecated in July 2023. If you have not already, we highly recommend you migrate as soon as possible to Google’s new web analytics solution: Google Analytics 4 (GA4 from now on). We are here to give you a hand and take you through the process step by step.
1. Audit your current UA set up
- Check and document your goals, custom events, custom definitions (dimensions and metrics), custom channel groupings, filters and any other custom configuration. GA4 differs in many ways from UA, so you will need to “translate” everything according to GA4’s new structure and data collection logic.
- Note your basic configuration options, such as time zone and currency.
- Filters are extremely limited in GA4 right now, as the user is only able to filter out internal or developer traffic.
- A notable difference is the change in event tracking logic. Say goodbye to the archaic structure of events in UA, you will not be using category/action/label anymore. Instead, GA4’s event structure is simply event names and event parameters. So, for example, you may have a page_view event containing parameters such as page_path, user_location, etc. Many of these parameters will be added by default, but you can always add more custom parameters by using GTM variables.
2. Document your measurement plan
Taking these nuances into account, it is time to understand, plan, and document what you want to measure in GA4.
- First off, you’ll want to know what data streams you will be adding to your property. If you have a website, an Android app, and an iOS app, you will need to add 3 data streams.
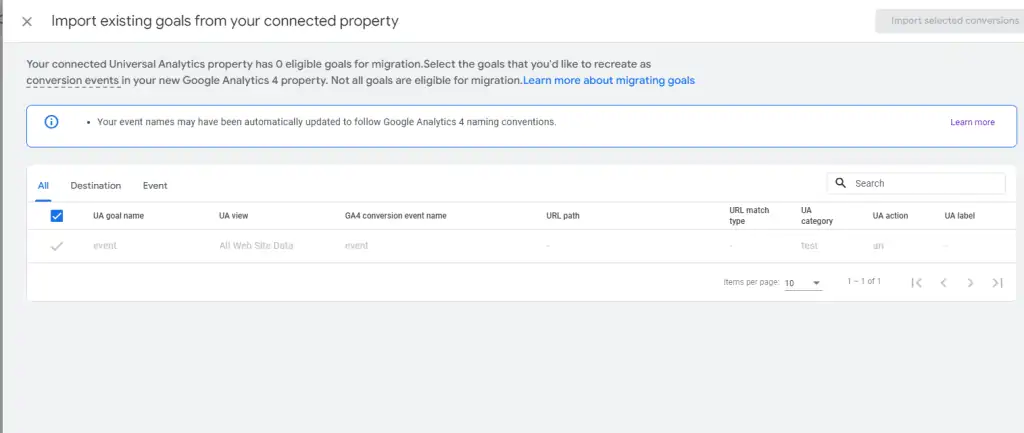
- Now, identify which events you want to migrate. This should be done meticulously due to the differences between UA and GA4. You are free to use Google’s new migration tool for this, although we highly recommend setting things up from scratch to keep full control of what you measure.
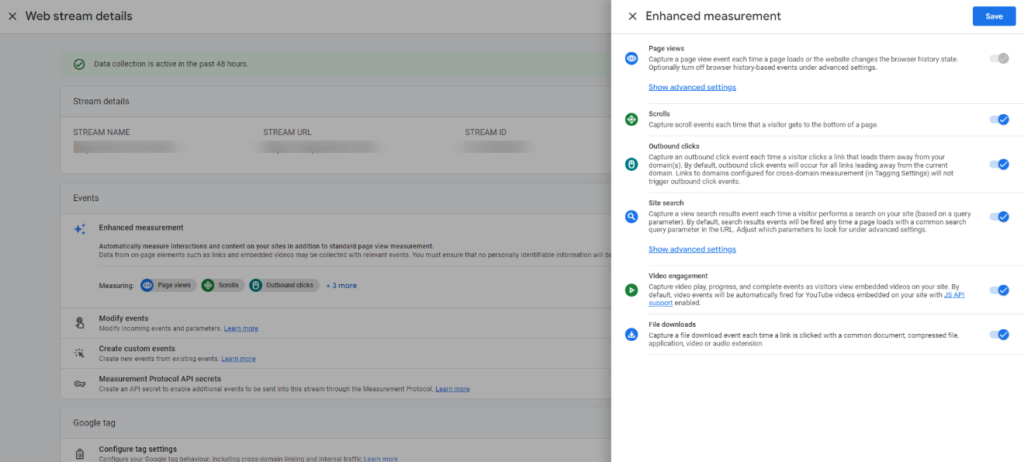
- Bear in mind GA4’s enhanced measurement can track several default events for you. You can read more about enhanced measurement here, but in any case, we emphasize setting your major events up from scratch. This way you can add the parameters you wish and ensure the tracking logic, naming, etc, is one that is useful for you. To provide an example, one of the events measured in enhanced measurement is “click”. This is counterintuitive since this event measures only outbound clicks. In most cases, advanced users will want to have custom measurement and naming for outbound and inbound clicks. Same goes for page_view and scroll events.
- For custom dimensions, things have also changed considerably. In GA4, a custom dimension needs to exist as an event parameter first and can be configured to be event- or session-scoped.

- Conversions in GA4 are merely events marked as such. It’s still important to mark them so you can use them in reporting and import them into advertising platforms like Google Ads. You can set up a maximum of 30 conversions in GA4, which is a significant improvement from UA.
- You can use a template like the one provided by Ken Williams to help you get started. You can find it here.
3. Implement your measurement plan
- To begin your implementation, you’ll first need a GA4 configuration tag. You’ll just need to copy and paste the Measurement ID of your GA4 property, which you can easily find in your data streams section. We recommend setting this up as a constant variable for easier management.
- Once the config tag is set up, you can start adding events and parameters. Most of the time, parameters will first be set up as variables, often retrieved from the data layer. When it comes to events, there’s three main ways to configure them:
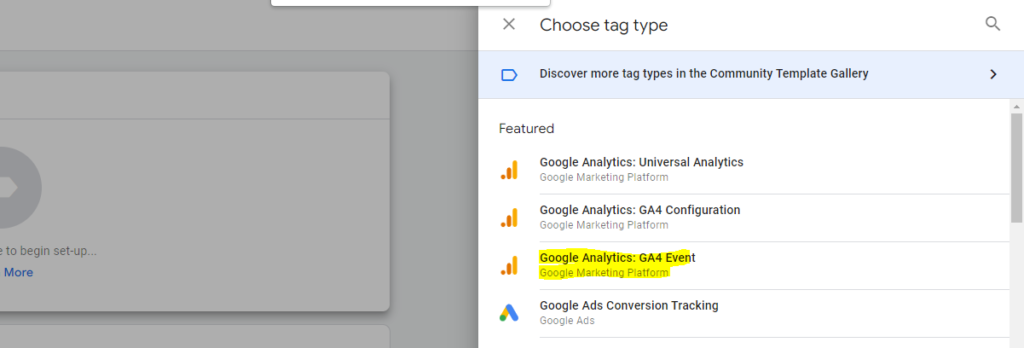
3.1. GTM
- Add a GA4 event tag. Within the tag, you can add any custom parameters as desired and set it up to trigger as any other tag.
3.2. On the GA4 UI
- The new UI still needs further development, but one of the great things it offers is in-platform event creation. We recommend creating generic events on GTM (for example, lead submissions) and create “sub-events” directly on the “Configure” section of GA4 depending on specific parameter values. Following the previous example, you could create a specific lead submission event from the generic one depending on page path, file name, etc.
3.3 Through Audience triggers
- The GA4 UI allows you to create audiences from several sources. During the audience-creation process, you will be able to add an “audience trigger”, which will create a custom event every time a user enters that audience.
4. Monitoring data changes
- As previously mentioned, there are several important changes in measurement logic on GA4 compared to UA. You can read more about these differences here.
- Once your GA4 property is fully set up, we recommend monitoring data collection differences between your new and your old GA. KA Digital has developed this brilliant dashboard with this in mind.
As you can see, planning and configuring GA4 beyond standard set up can be tricky and workload-heavy. At All Around, we have already successfully migrated most of our clients, adapting each configuration to their individual needs, from e-commerce to B2B. If you need a hand, don’t hesitate to reach out! We will help you evaluate your current UA and adapt the migration to your particular needs.
More posts about: Transform your business